
Local VPN Setup with UniFi Security Gateway
Background
Many people use a VPN to access their corporate network, but there are a couple reasons you might also want to utilize a VPN outside of work:
- A VPN is essentially an encrypted tunnel between you and a remote server. This protects your web browsing and other traffic from prying eyes on shared wifi networks.
- A VPN can be used to securely access resources on your home network when you’re not at home.
Many commercial products exist to provide individuals with options for VPN. Some options are more trustworthy than others. Using a 3rd party service is easy to set up, but comes with a few key downsides – you’re placing a lot of trust in that service provider, the service probably comes with a monthly or yearly fee, and it’s not going to help you if you want to access resources on your home network.
I want to run my own VPN, and found that the UniFi Security Gateway (USG) that I already have can run a VPN service. Setting it up involved a few steps, but overall was pretty easy.
Setting it up with UniFi Security Gateway
- To get started, log into your UniFi Controller interface and go into settings, and choose the radius tab, if it’s not already chosen.
- Under Server enable the RADIUS server, type in a secret and leave the rest of the options set to the default.
- Select the Users menu option and create at least one new user.
- Enter a username and password to be used for authenticating with the VPN.
- Leave VLAN blank, unless you have a reason for using a different VLAN.
- For Tunnel Type choose “3 - Layer Two Tunneling Protocol (L2TP)”
- For Tunnel Medium Type choose “1 - IPv4 (IP version 4)”
- After saving your user(s), Click on Profiles on the left menu and notice that a new “Default” radius profile has been created. You should be able to roll with those defaults.
- Next, choose the Networks menu option on the left and click Create New Network
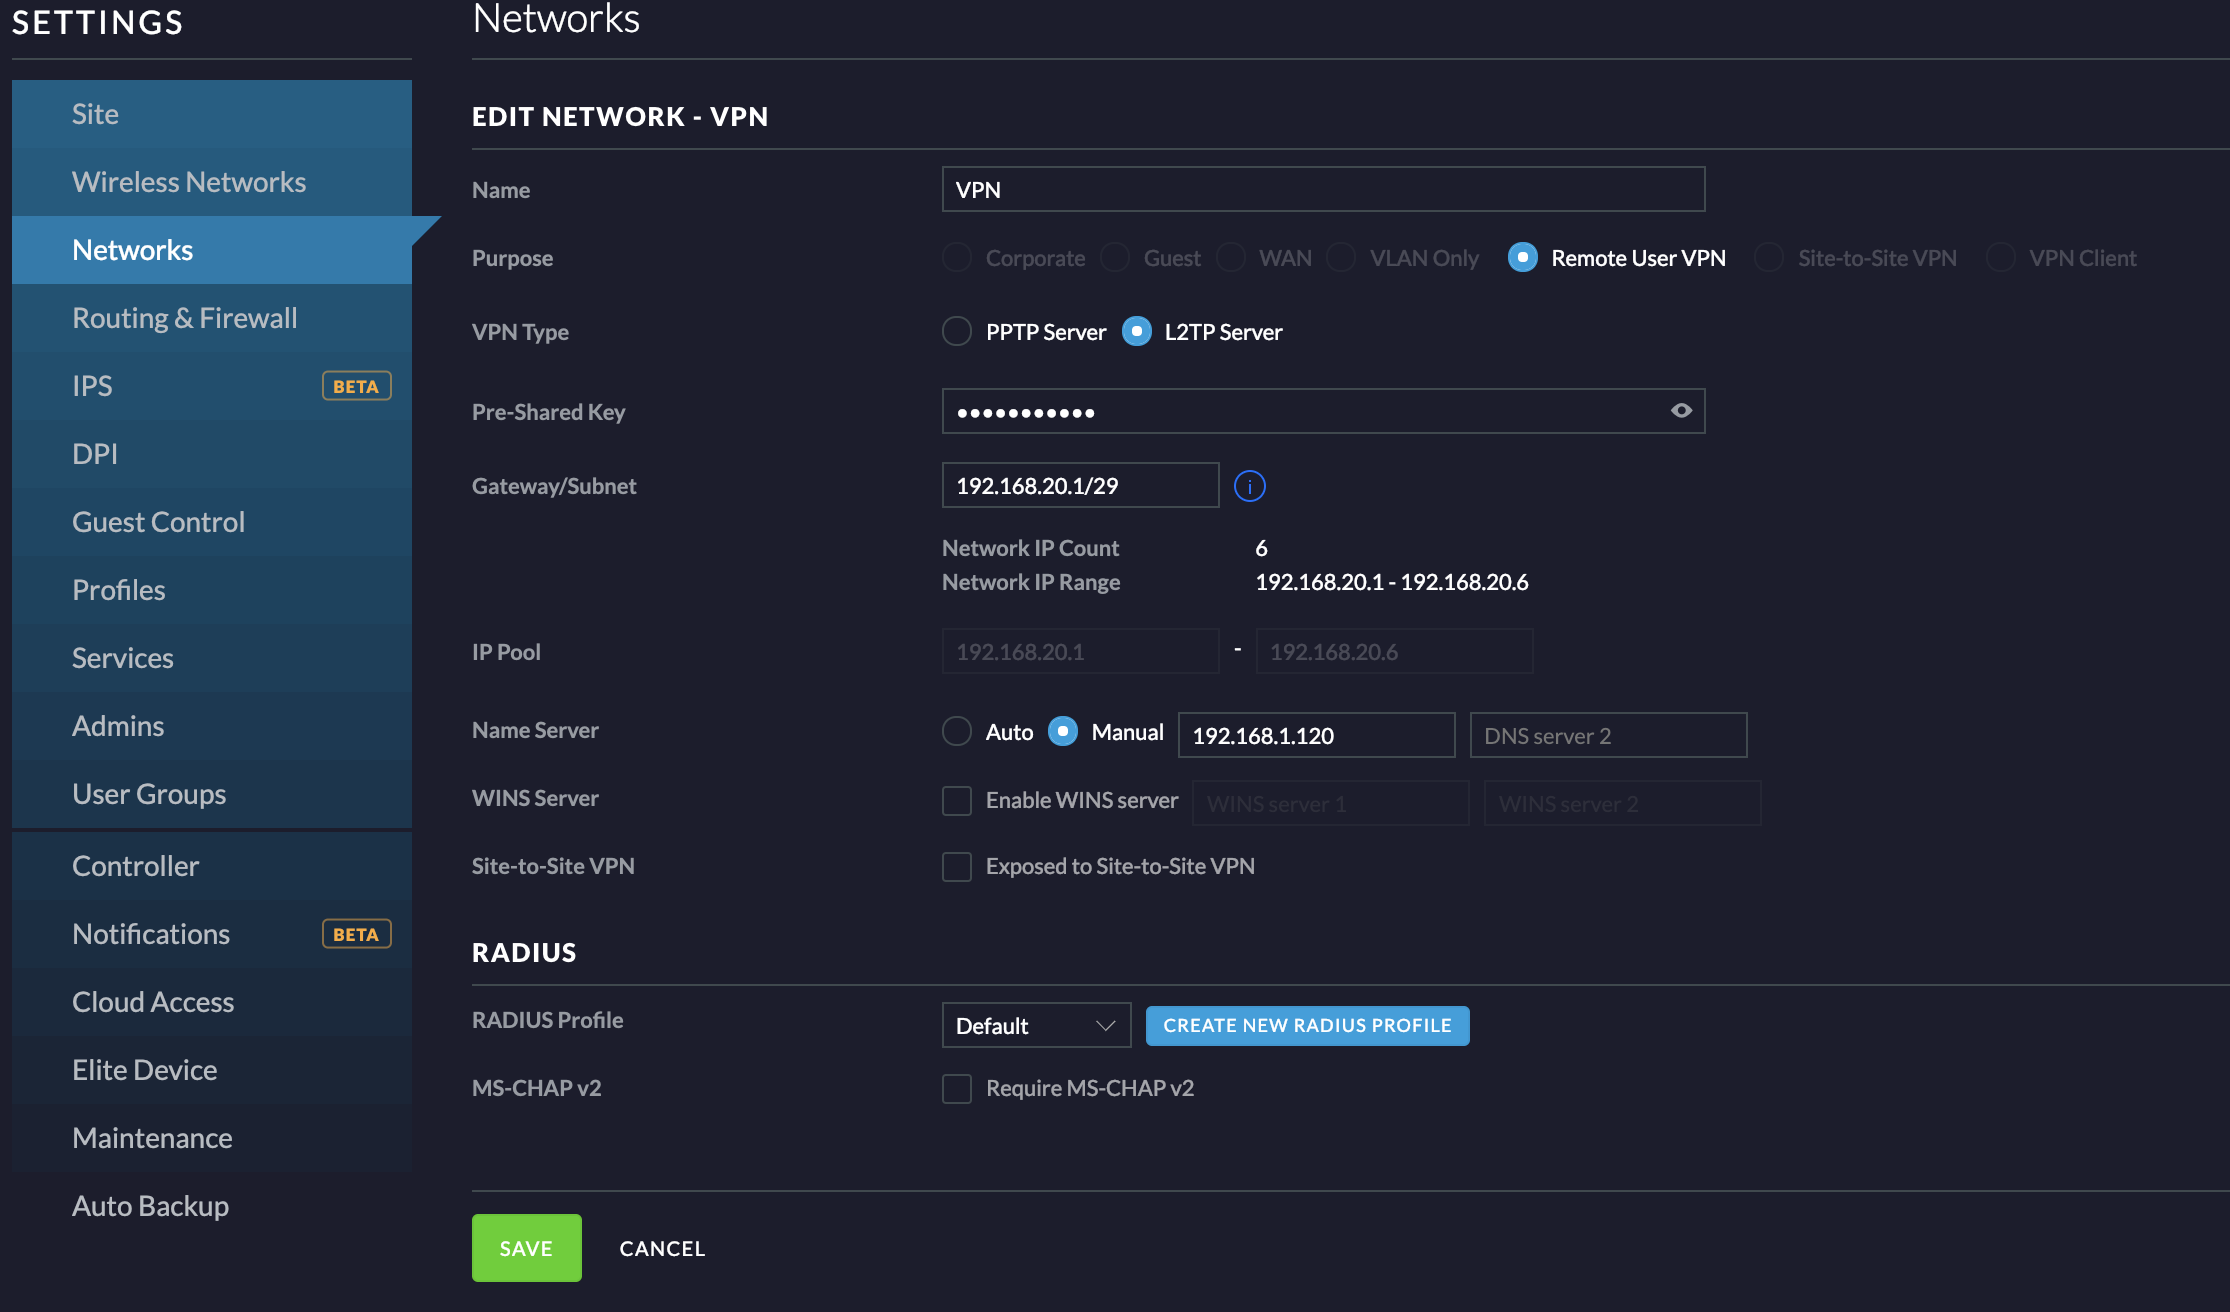
- Name it “VPN” or whatever makes the most sense to you.
- For Purpose choose “Remote VPN User”
- For VPN Type choose “L2TP Server”
- Choose a Gateway/Subnet. This should be a local ip range (e.g.,
192.168.20.1/29) that doesn’t conflict with anything currently on your network. Choose a suffix that’s appropriate for your needs. I don’t expect to have many clients connecting to this, so I chose/29, which will give me 6 IPS on the network. - For Name Server, if you have a local DNS server you should choose Manual and enter the local ip of that DNS server. If not, just leave the setting at Auto.
- The remaining settings can be left at their defaults.
Connect with a VPN Client
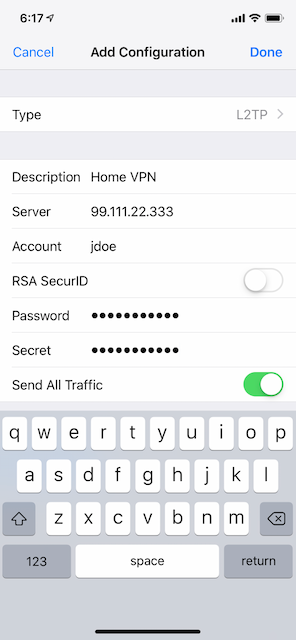
You should now have a working VPN. You can use the public IP of your router to test the connection. The setup will vary by client, but if you’re on iOS like me, you can add a new VPN configuration from the Settings->VPN section.
A couple notes on each value in that screen:
- Type: Choose L2TP because that’s the type of VPN we configured on the USG.
- Server: This should be your public ip. If you’re not sure what that is, just google “what is my ip”.
- Account: This is the radius username you set up previously
- Password: This is the pre-shared key that you defined when adding the VPN network in step 5
- Secret: This is the secret you set up when adding the Radius server previously
If you’re testing on your phone, be sure to disable wi-fi if you’re on your home network. After connecting to the VPN verify that you’re able to load public websites as well as access resources on your local network.
For the next step, we’ll add DNS, so that we don’t have to connect via IP.
Adding DNS for your VPN
IP addresses are hard to remember, and often times are subject to change, so you’ll probably want to set up DNS for connecting to your VPN (e.g., vpn.mydomain.com). Below, I’m assuming that you don’t have a static IP from your ISP, so you’ll need to utilize a dynamic dns service – this will ensure that if your ISP changes your IP, your DNS will still resolve to your home router.
- Register a domain name, if you don’t already have one. I used NameCheap because they offer free Dynamic DNS service that works out of the box with the USG.
- Configure your domain with your Dynamic DNS provider. On NameCheap, this is done by clicking Manage next to your domain, then going to Advanced DNS. If you scroll down a bit on that page, you’ll see a section for Dynamic DNS. Once you enable it, it will display a Dynamic DNS Password. Take note of this for a future step.
- By now you should have active Dynamic DNS service and a password from that provider. Log back into the UniFi controller, choose Services from the left menu and then choose Dynamic DNS.
- Choose your service provider from the list, enter a hostname, username and the password that was given to you.
- For namecheap, the username is the same as the hostname you want to use.
- For namecheap, the server is always
dynamicdns.park-your-domain.com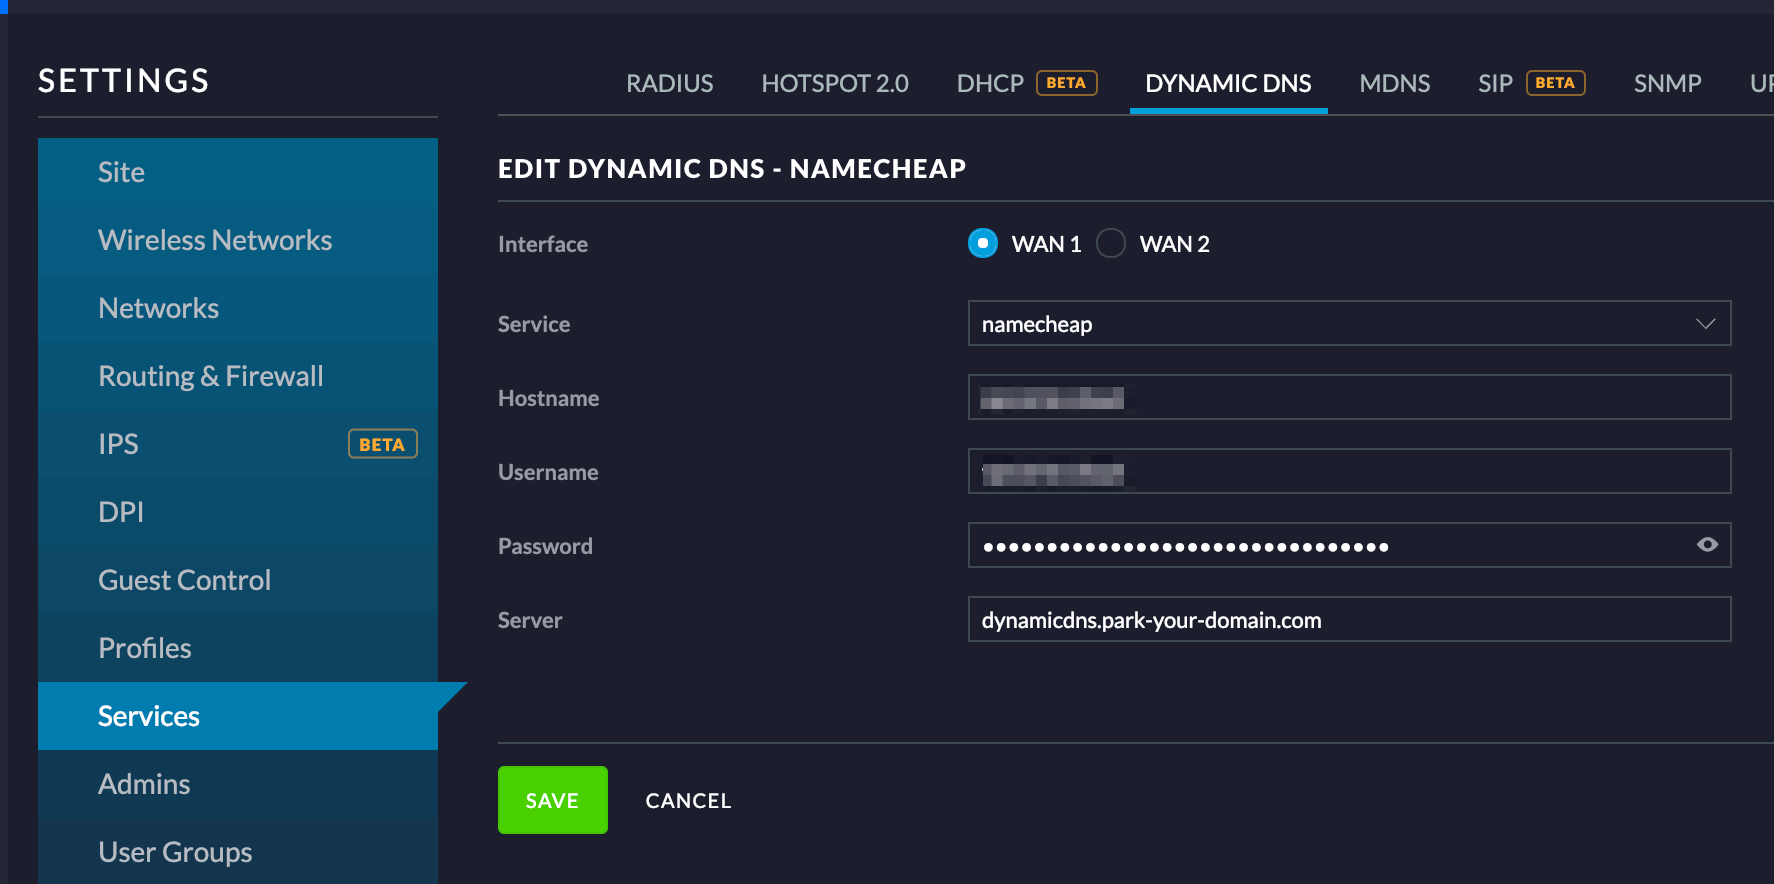
That should be all there is to it. Now you can edit your VPN client’s settings to use your chosen hostname instead of the IP address.